Management > Certificate Manager > Console User Guide
Console User Guide describes basic requirements to enable Certificate Manager. * Notification Group * Certificate * Domain * User Data * Authorization for Retrieve/Download certificates API
Notification Group
Certificate Manager sets notification cycle on each expiration date and manages notification recipients, by notification group.
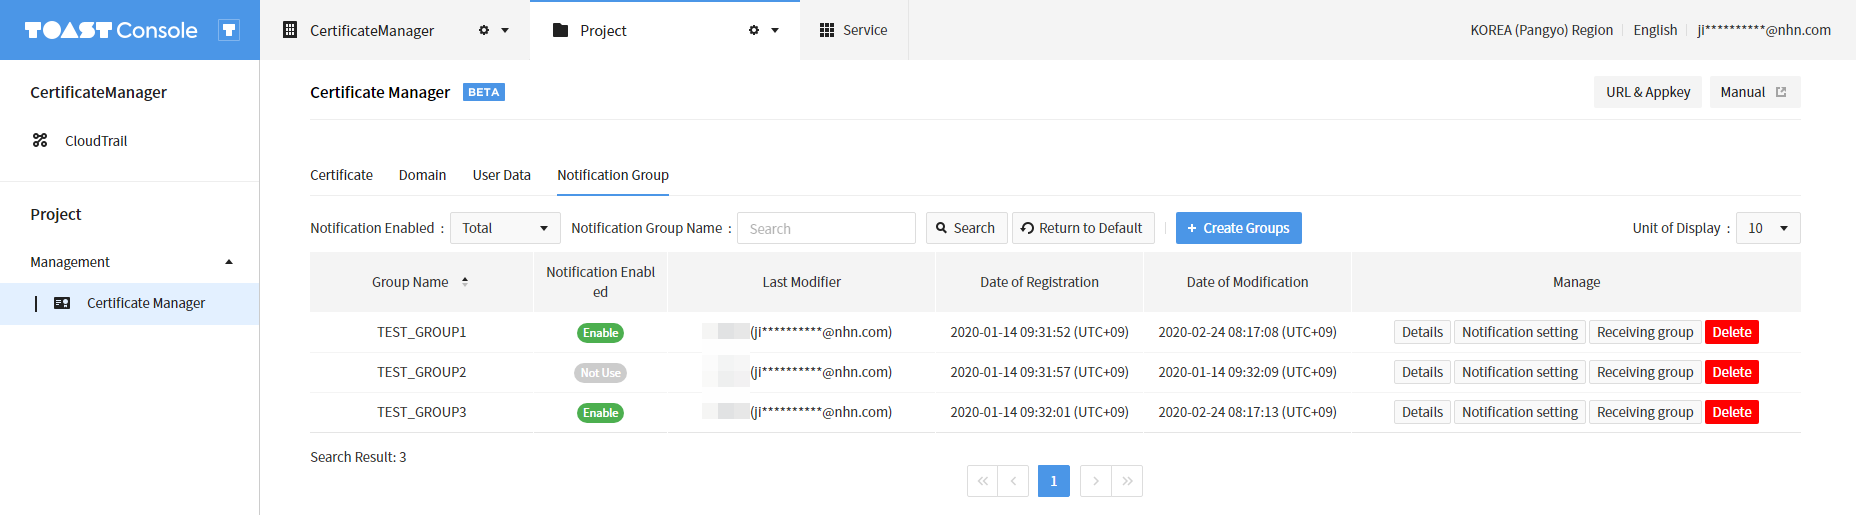
Creating Notification Groups
- Click + Create Groups on the main page of notification group, and you'll find a page like below.

- Enter name for a group. No duplicate name is allowed.
- Enter whether to enable notification. You can choose whether to send all notifications, including expiration dates, to group users.
- Click Add and create a notification group.
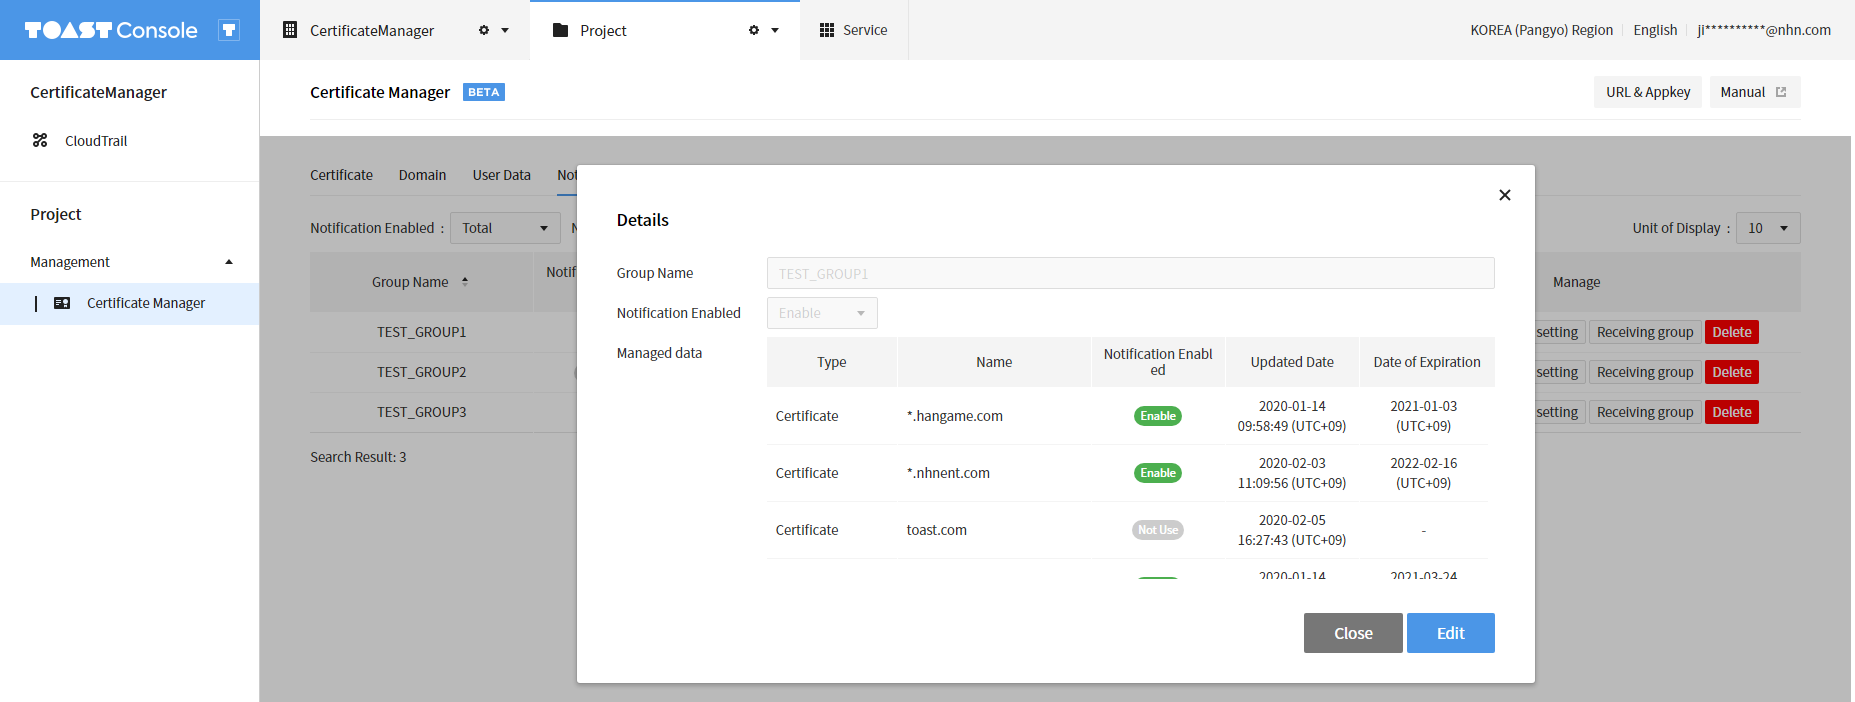
Detail Page
- Click Details on the main page, and it shows name of the group, whether notification is enabled, and management data. Managed Data refers to certificate/domain/user data that are integrated with each notification group.
- Click Edit to change name of the group or notification enabled/disabled.
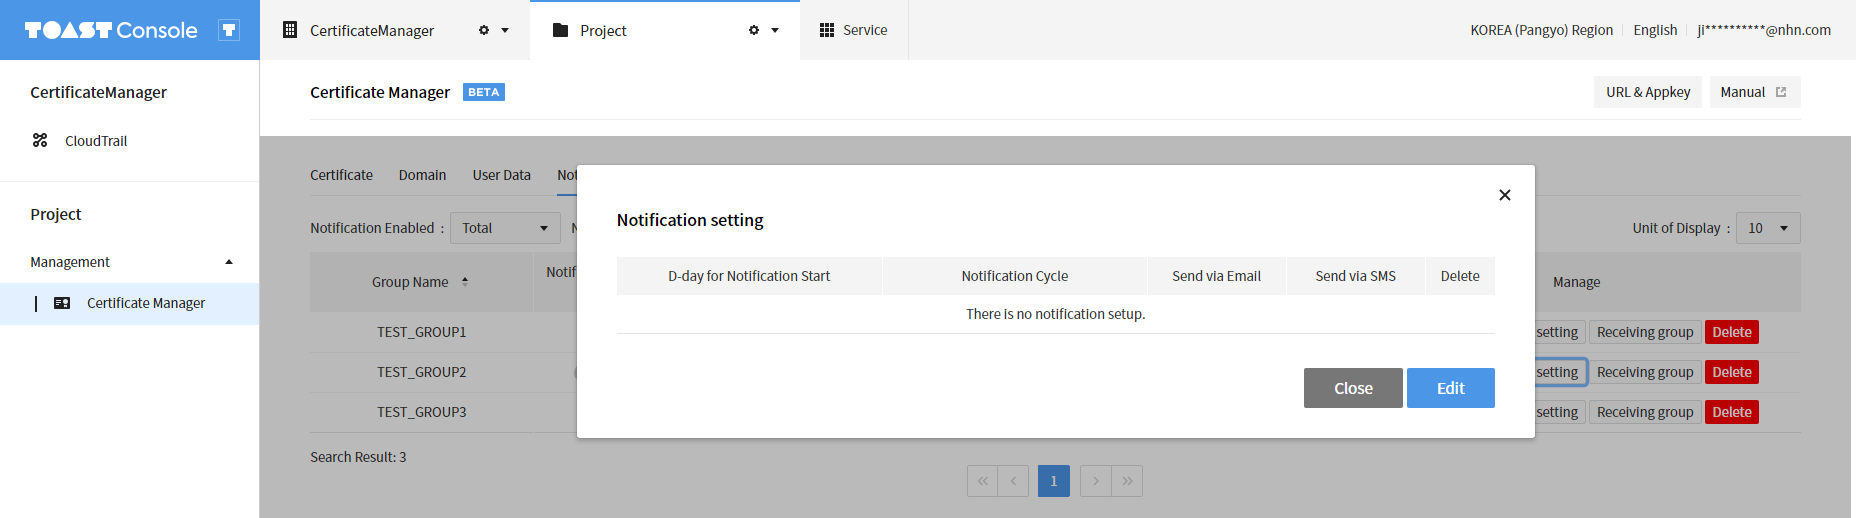
Notification Setup
- Click Notification Setting on the main page and you can find notification policy for expiration dates set for each notification group.
- By default, notification policy is not set. You need to add notification policy to be notified on each expiration date.
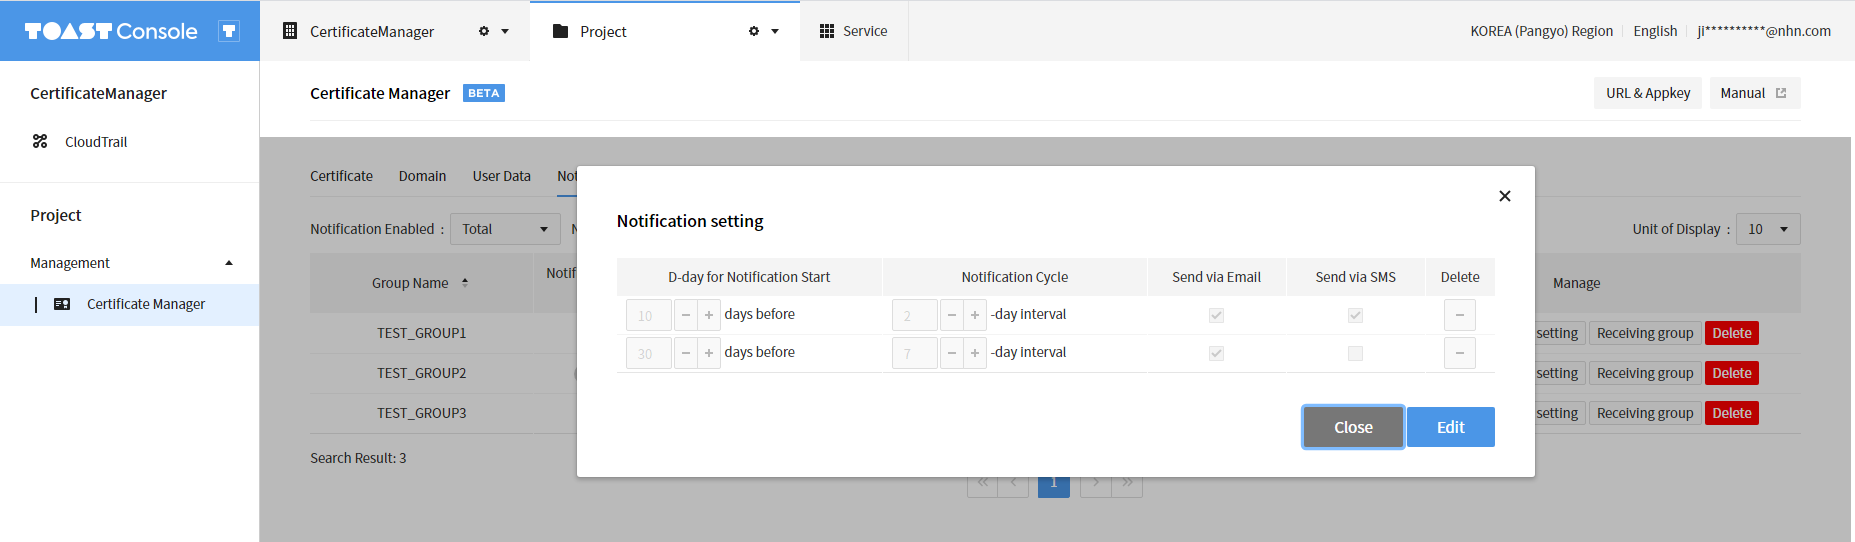
Adding Notifications
- Click + at the bottom left of the table to add notification policy.
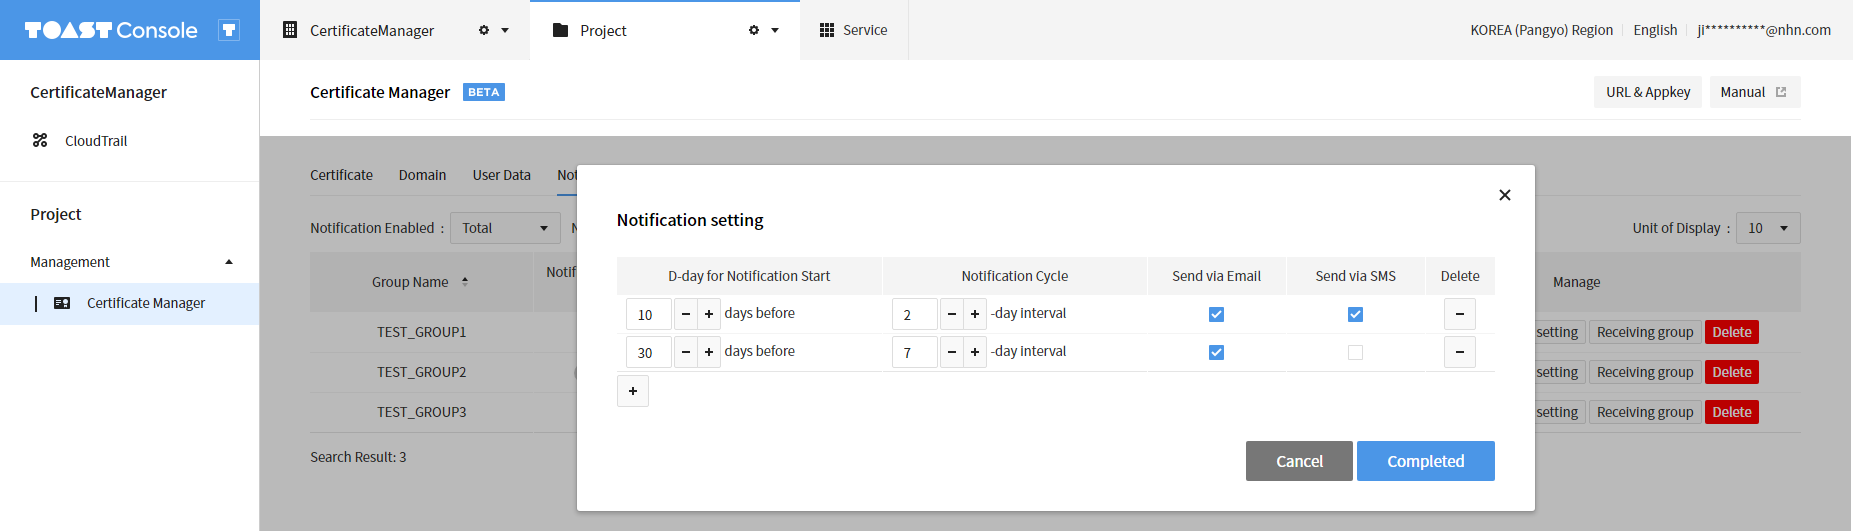
- D-day for Notification Start refers to since how many days ago notifications can be sent from expiration dates of certificate/domain/user data.
- Notification Cycle means how often notification is to be sent from D-day for notification start.
- Send via Email and Send via SMS refer to whether to use Email or SMS to send notifications. If both are unchecked, notification is not sent.
- Click - of Delete to delete notification policy.
- D-day for Notification Start and Notification Cycle cannot be redundantly set.
- Click Completed to save notification policy as configured.
User Group Integration
On the main page of notification group, click Receiving group, and users that are integrated to the notification group are displayed. By default, the notification group creator is added.
NHN Cloud project members can be integrated as the group users. 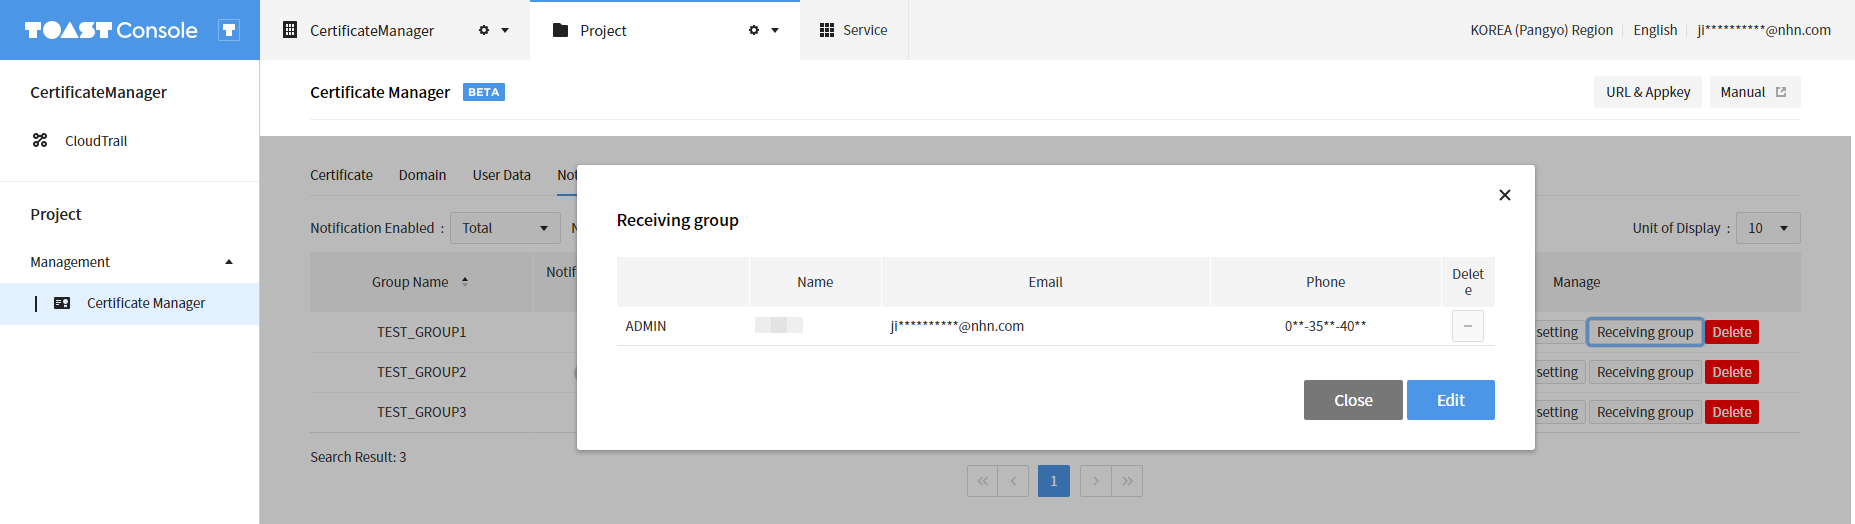
Adding Users
On the search window for user integration above, you may search and add NHN Cloud project members.
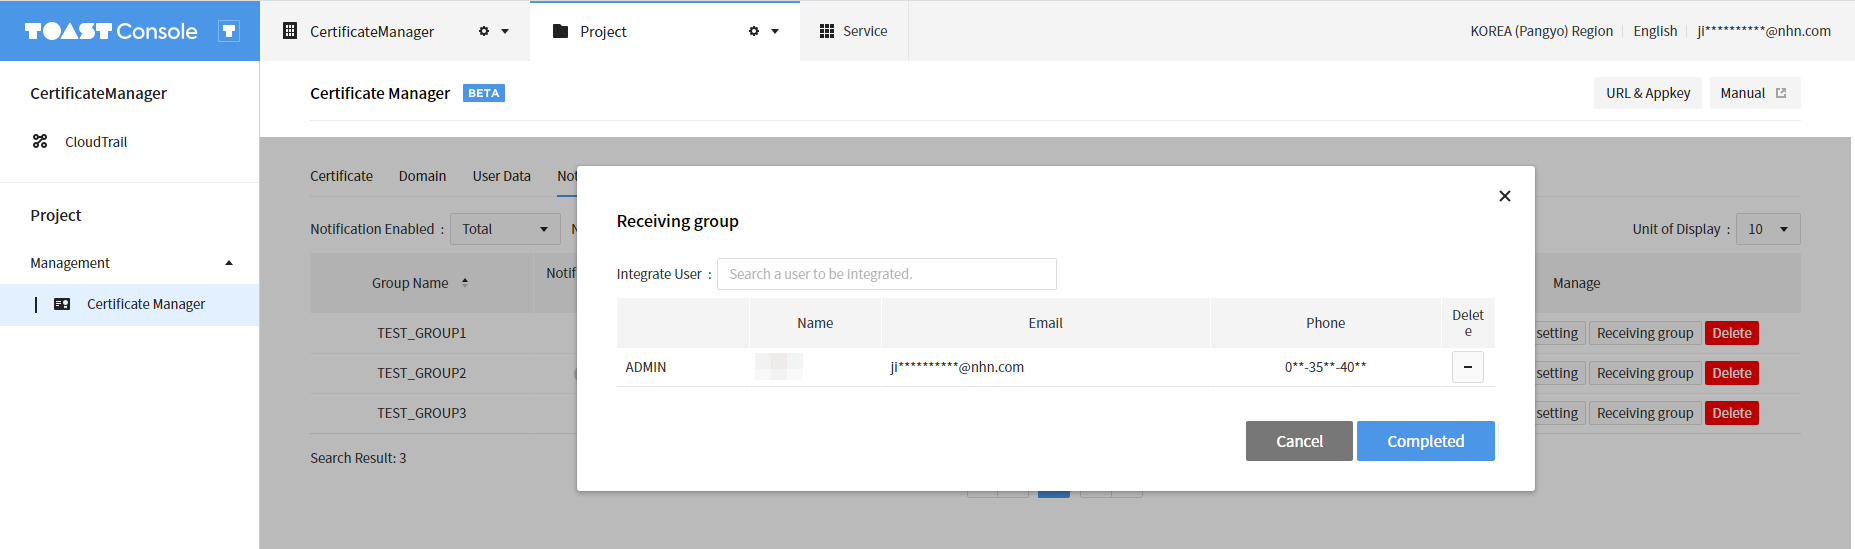
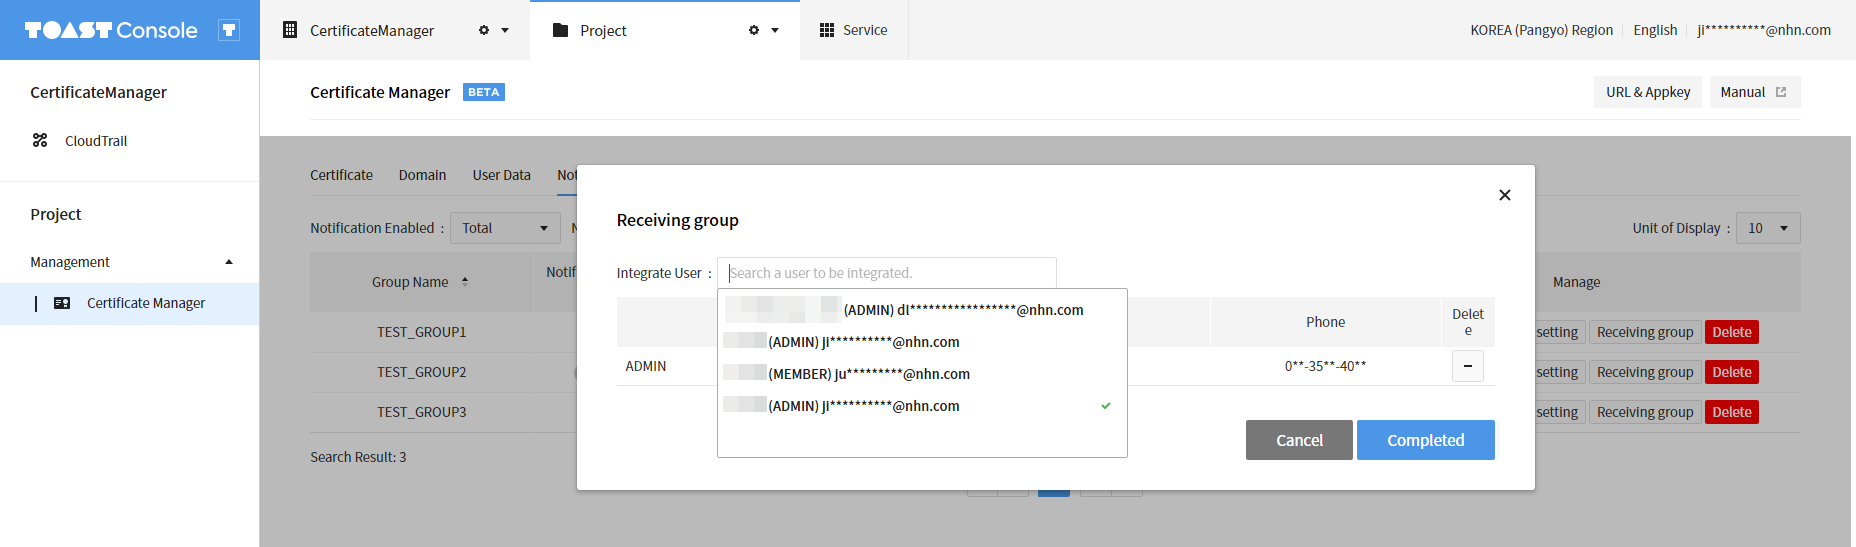
- Type refers to the user's authority (Admin/Member) for a NHN Cloud project.
- You can check Name, Email and Phone of each member.
- When a member's mobile phone number is not registered, you shall find '-' for Phone. In such case, it fails to send notification via SMS; then, a failure message of notification delivery is sent to ADMIN of each group.
Certificate
Enter domain name (e.g. *.toast.com) and expiration date of certificate, and then notification is sent to user, in accordance with notification policy of an integrated notification group.
To upload certificate files (.pem), following items are automatically collected from such files. * Creation date * Expiration date * Signature type of a certificate (ex: sha256RSA) * Certification institution (ex. Digicert)
To register certificate installation information, import certificate from the IP and port of such information so as to compare them with registered certificate and expiration date at CertificateManager. If auto-collected certificate installation information has earlier expiration date than that of the registered certificate at CertificateManager, notification is sent to alert that certificate needs to be replaced.
Main Page
On the main page of certificate, you can find list of certificates and remaining days until expired.
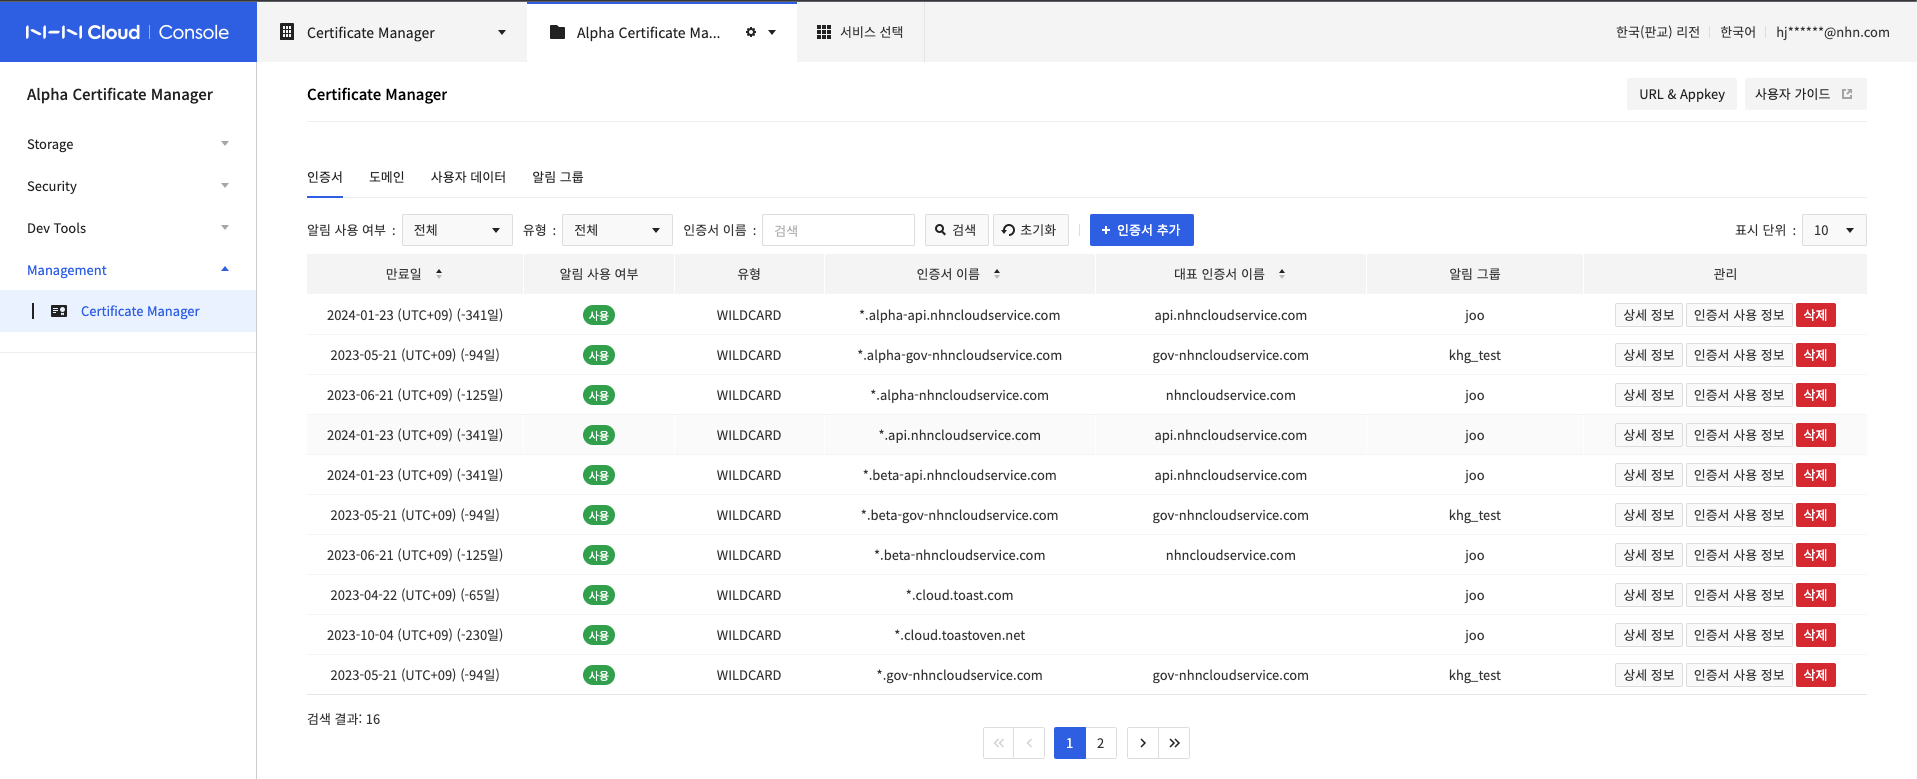
- You can find and search the list of already registered certificates.
- Also check remaining days until expired.
- As of today, expired data are displayed in red, whereas data with less than 30 days until expired are displayed in orange.
Creating Certificates
- On the main page of a certificate, click + Add Certificates and you can find the page as follows.
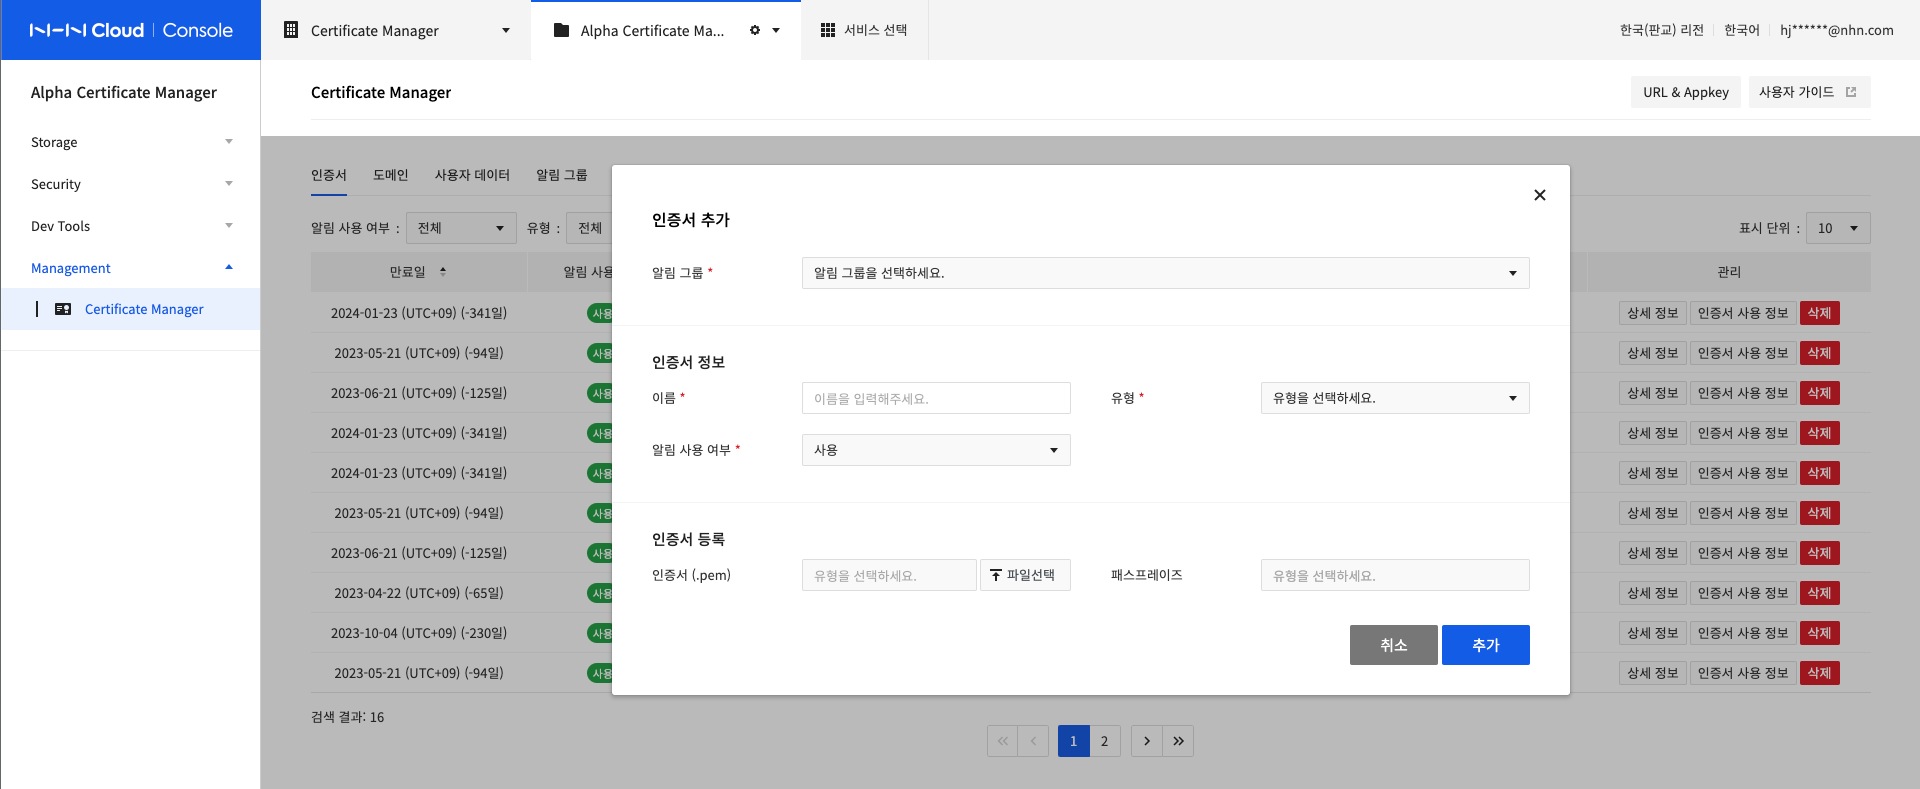
- Select a Notification Group to integrate. In case a notification group is not created, there is no available notification group, and hence certificate cannot be created.
- Enter Name of a certificate (CommonName, CN): names cannot be redundantly registered.
- For SAN certificates, the certificate name and sub-certificate name are automatically entered when the certificate file is uploaded. The name of the certificate cannot be arbitrarily changed.
- Select an item in Type.
- Single is a single certificate.
- Wildcard is a common-purpose certificate (available for many hosts) starting with *(asterisk).
- SAN is a certificate that allows you to apply SSL to multiple domains with a single certificate.
- Register a certificate file in Certificate under Register Certificate.
Certificates are not required and can be registered later.- A certificate (.pem) is a pem file comprised of a private key and a certificate.
- For supported type of certificate file (.pem), see 'Troubleshooting Guide > Converting Certificate File Formats'.
- The maximum uploadable certificate is 512KB.
- Enter Passphrase of the private key included within certificate file.
- Click Add.
- For Single and Wildcard, one certificate is created.
- For SAN, both a main and sub certificate are created. For example, if there is 1 main certificate and 3 sub certificates, a total of 4 certificates are created.
- In order to integrate with Network > Load Balancer, passphrase of the certificate file must be deleted.
- Use the following command to delete passphrase.
bash
openssl rsa -in my_private_input.key -out my_private_output.key
- Use the following command to delete passphrase.
Detail Page
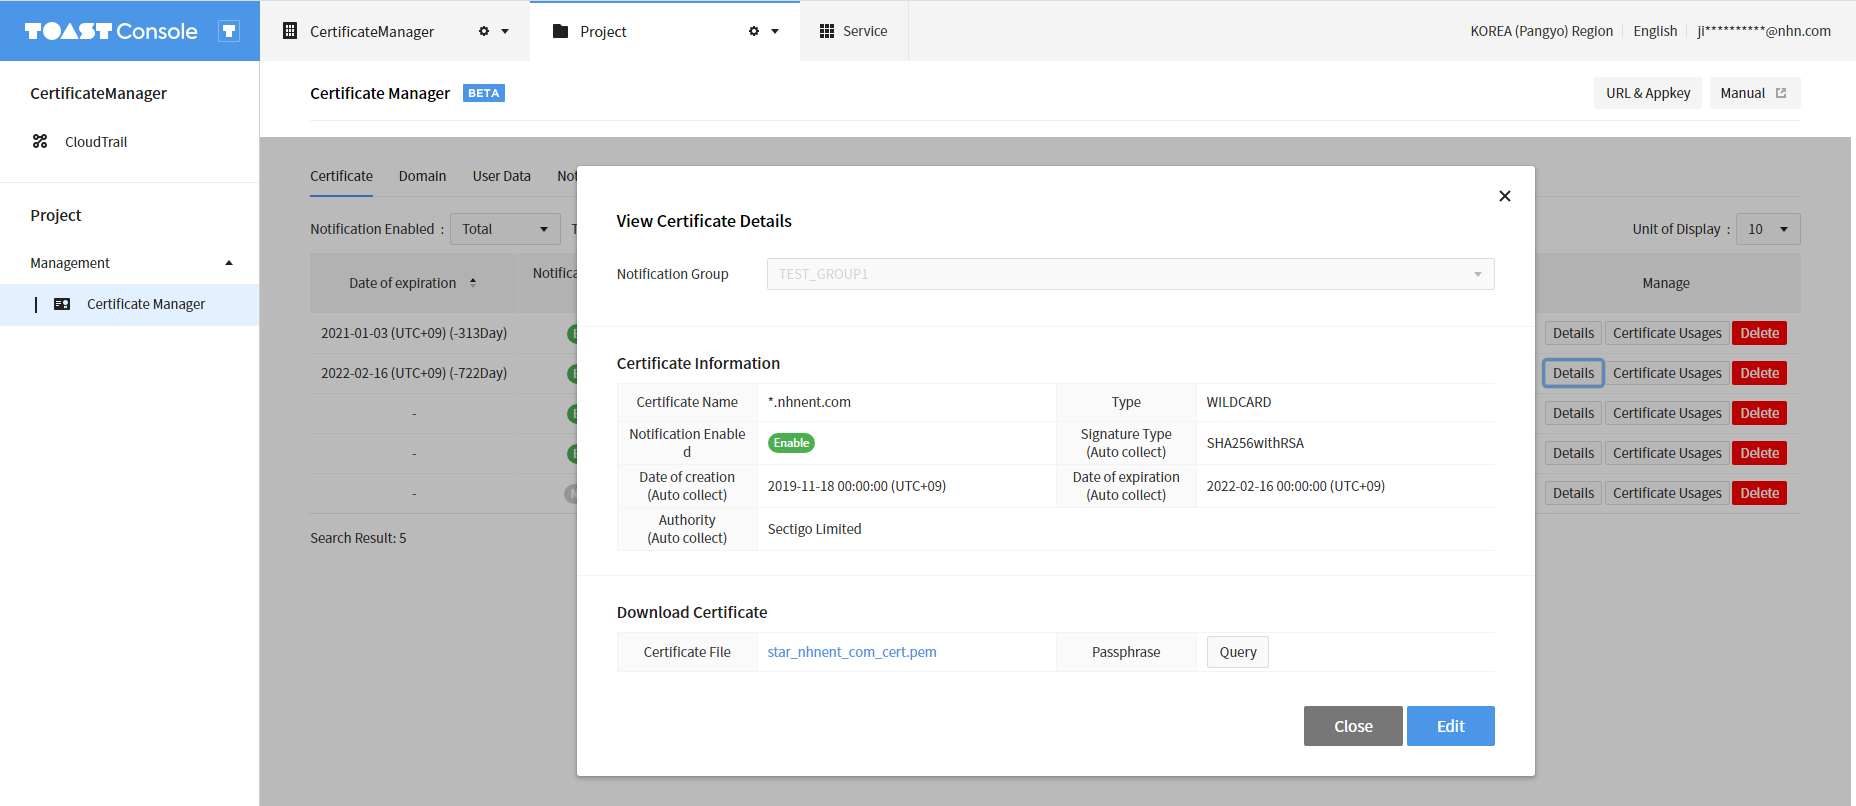
- Click Details on the main page of a certificate to find information of the certificate and file.
- Fields specified as (Auto Collect) after field name refer to automatically collected items from certificate files. If there is no registered certificate file, '-' shows.
- Click Edit to modify certificate information or (re)upload certificate files.
- Certificate names cannot be edited. If a name must be edited, delete a registered certificate and create a new one.
- Certificate names cannot be edited. If a name must be edited, delete a registered certificate and create a new one.
Creating Certificate Usage/Installation Information
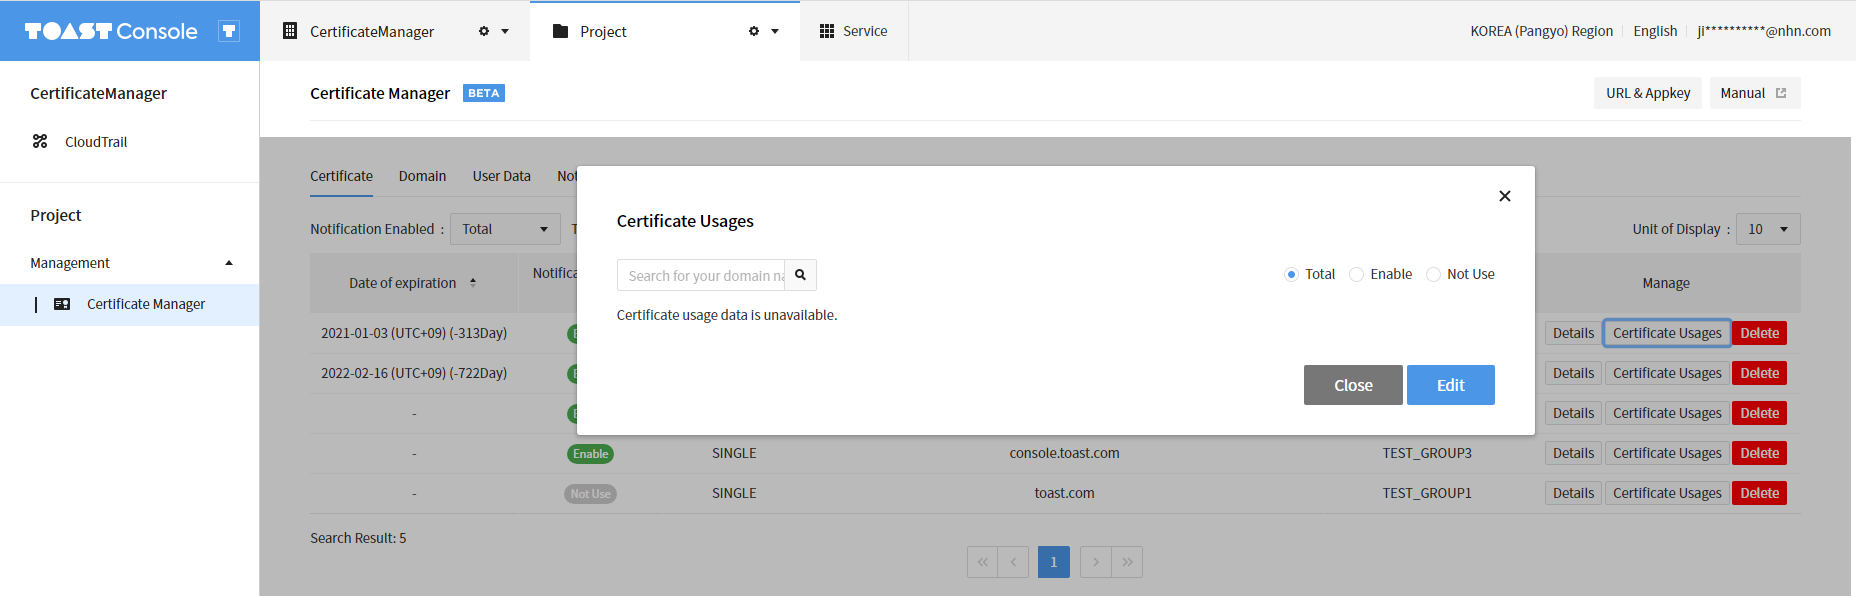
- Click Certificate Usages on the main page, and find usage and installation information of certificate. By default, no item is registered.
- Click Edit to find a page as below.
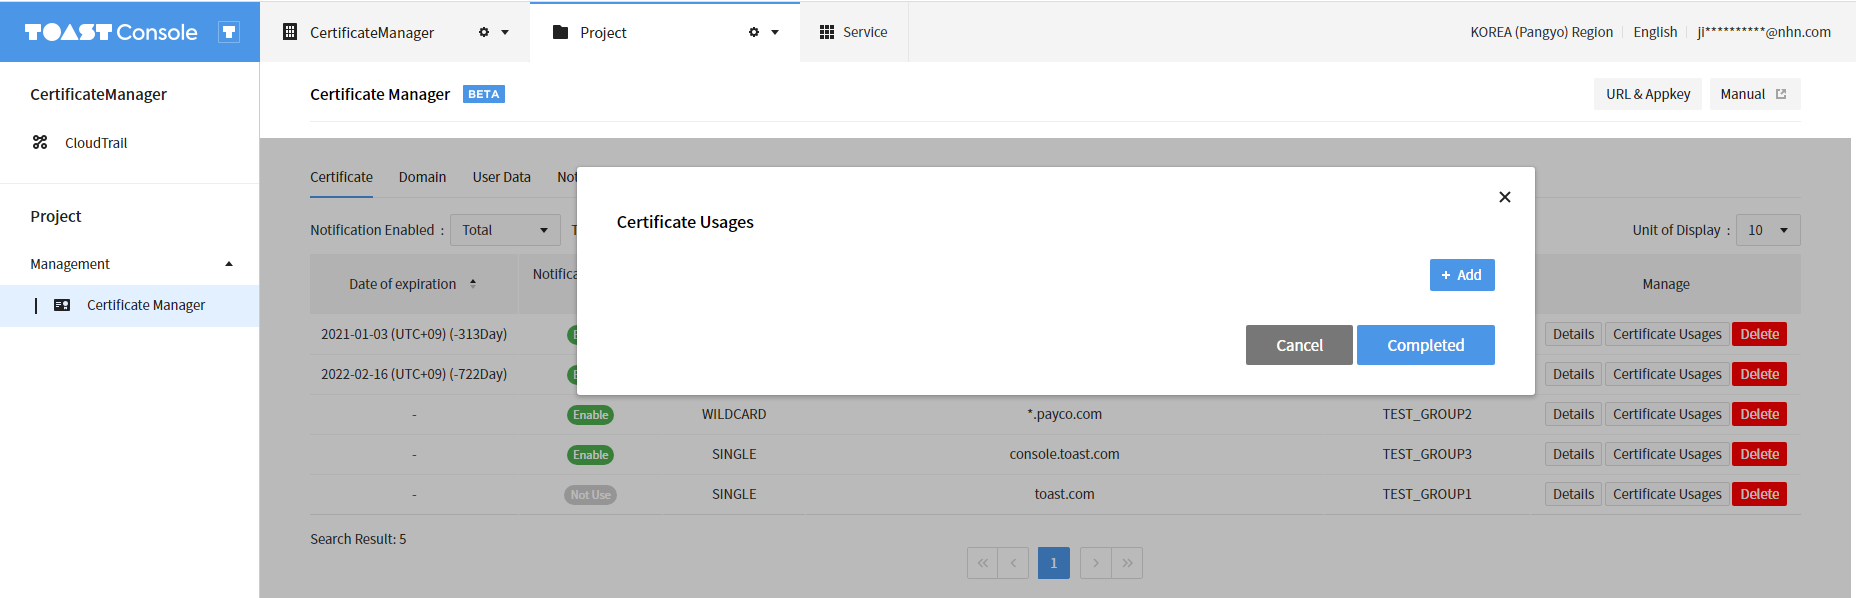
- Click + Add on top right to show a window to register certificate usage information.
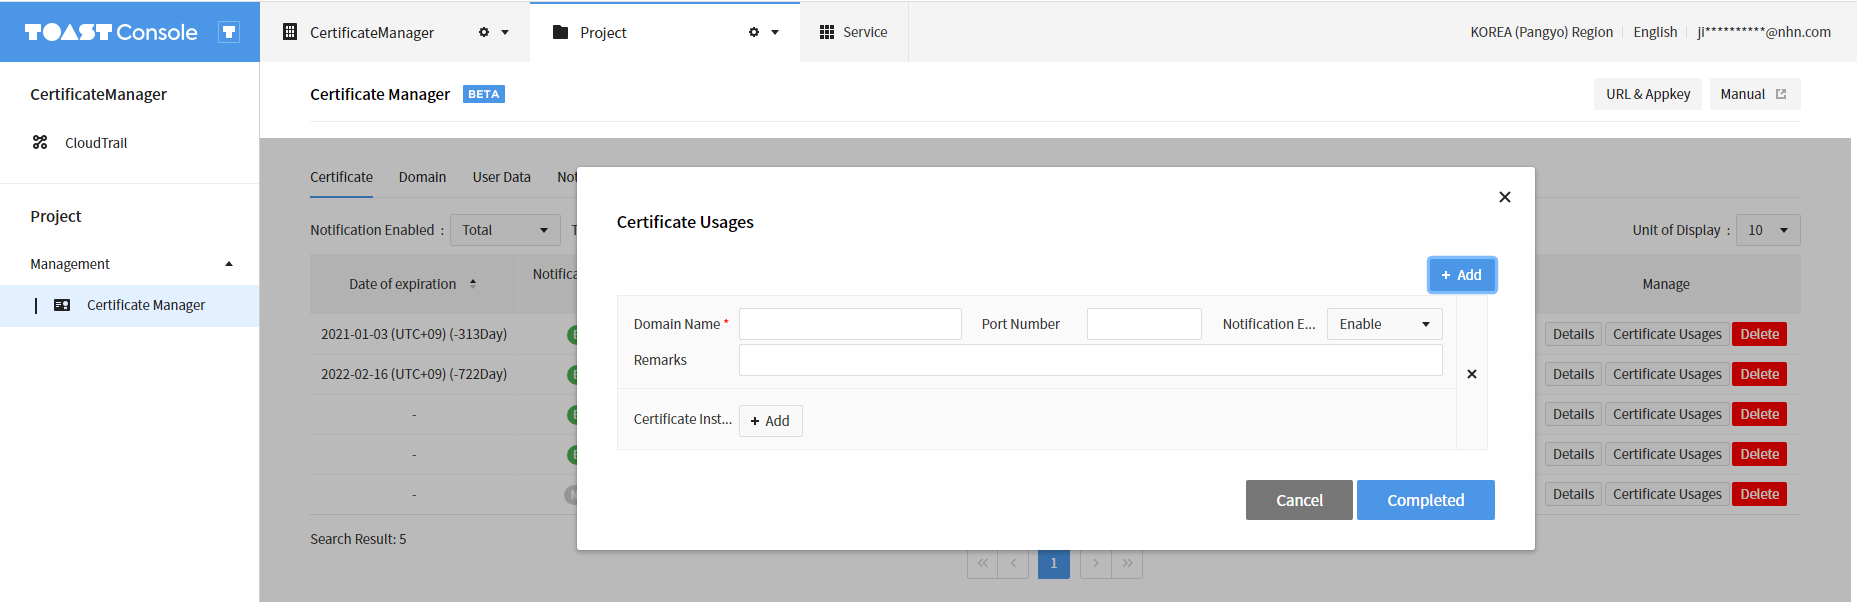 )
) - Enter name for certificate usage information.
- If the certificate type is Single, the name must be same as certificate name.
- If the certificate type is Wildcard, the name must be same as certificate name, excluding '*'(asterisk), or must end with ".[Certificate Name]", excluding '*'(asterisk).
- If the certificate type is SAN
- If the certificate name is in Single for, it must be the same as the certificate name.
- If the certificate name is in Wildcard form, it must be the same as the certificate name excluding '*' (asterisk) or end with '.[certificate name]' excluding '*' (asterisk).
- Enter whether to enable notification for certificate usage information.
- To enter certificate installation information, click + Add next to Certificate Installation Information. Then, a window like below shows.

- Enter IP address and Port No.. When auto-collect is enabled, download certificate via IP address and port number to compare expiration dates.
- In case of a private IP address (e.g. 192.168.0.1, 172.20.0.1, 10.0.0.1 ), downloading may fail and notification on failed auto collection may be sent.
- Click Completed to save usage and installation information of the certificate as set.
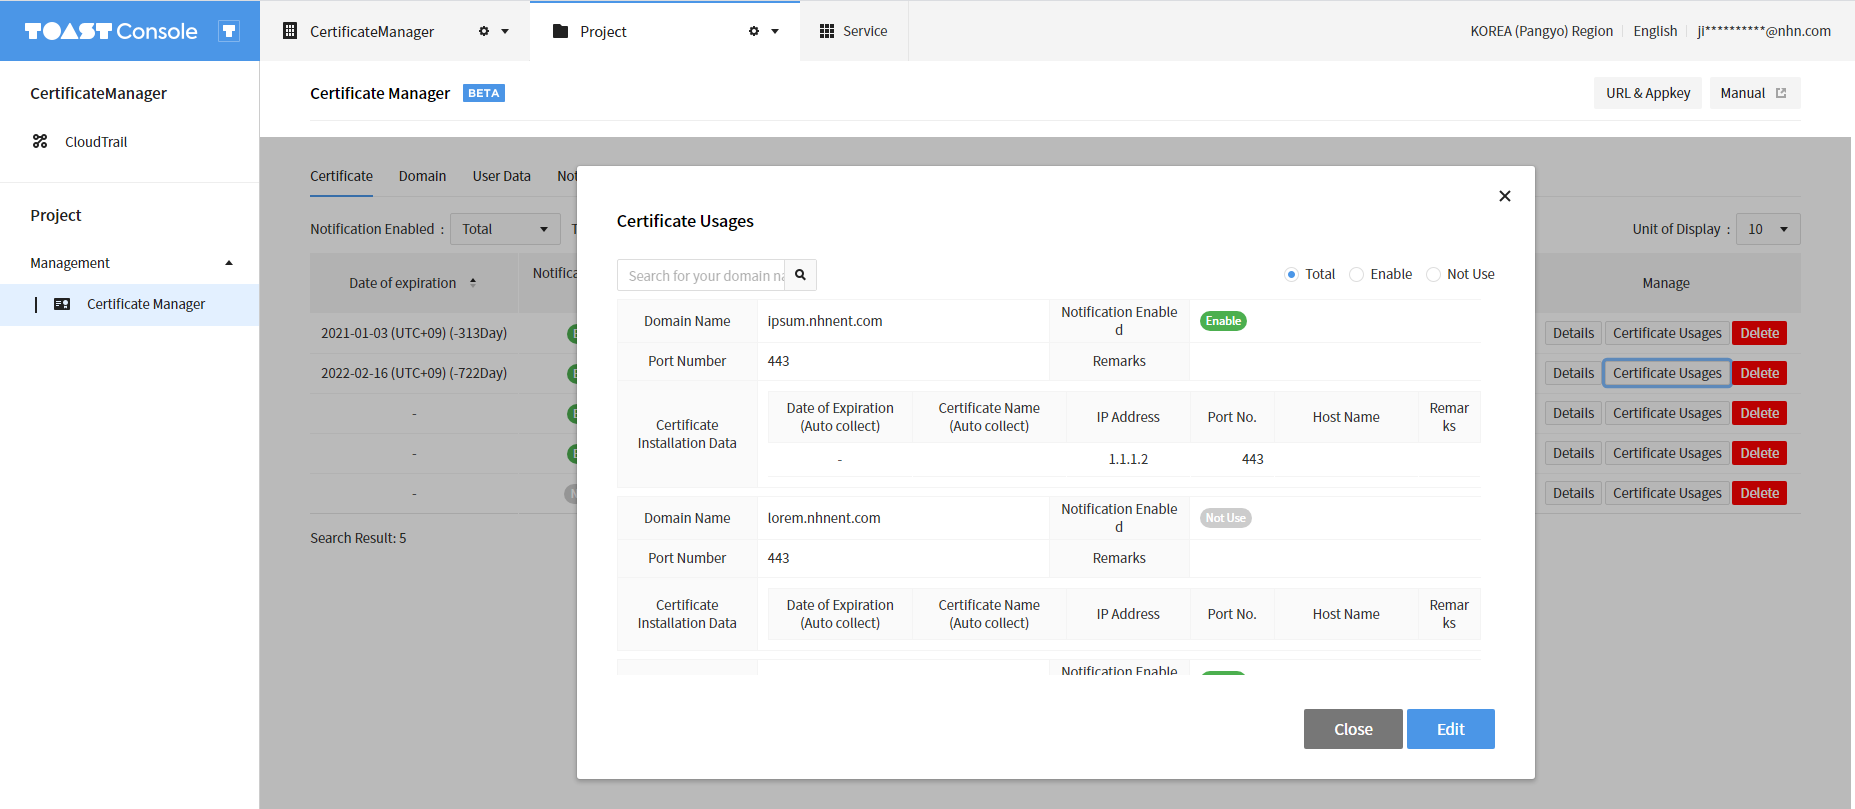
Page of Certificate Usage Information
- On the main page of a certificate, click Certificate Usages to check usage and installation information of certificate.
- Notifications of usage information can be filtered by selecting Total, Enabled, or Not Use on top right.
Domain
Enter name of domain (the highest domain name of DNS, e.g. toast.com) and expiration date, and notifications are sent to users in accordance with notification policy of an integrated notification group.
If 'Auto Collect' is enabled for domain, domain information is automatically collected from the whois server. Following items are automatically collected: * Creation Date * Expiration Date * Registrar (ex.Gabia, Inc.) * Registration institution (Registrant, domain's real owner) * Name server
Main Page
You can find and search the list of already registered domains.
Also check remaining days until expired.
As of today, expired data are displayed in red, whereas data with less than 30 days until expired are displayed in orange.
Creating Domains
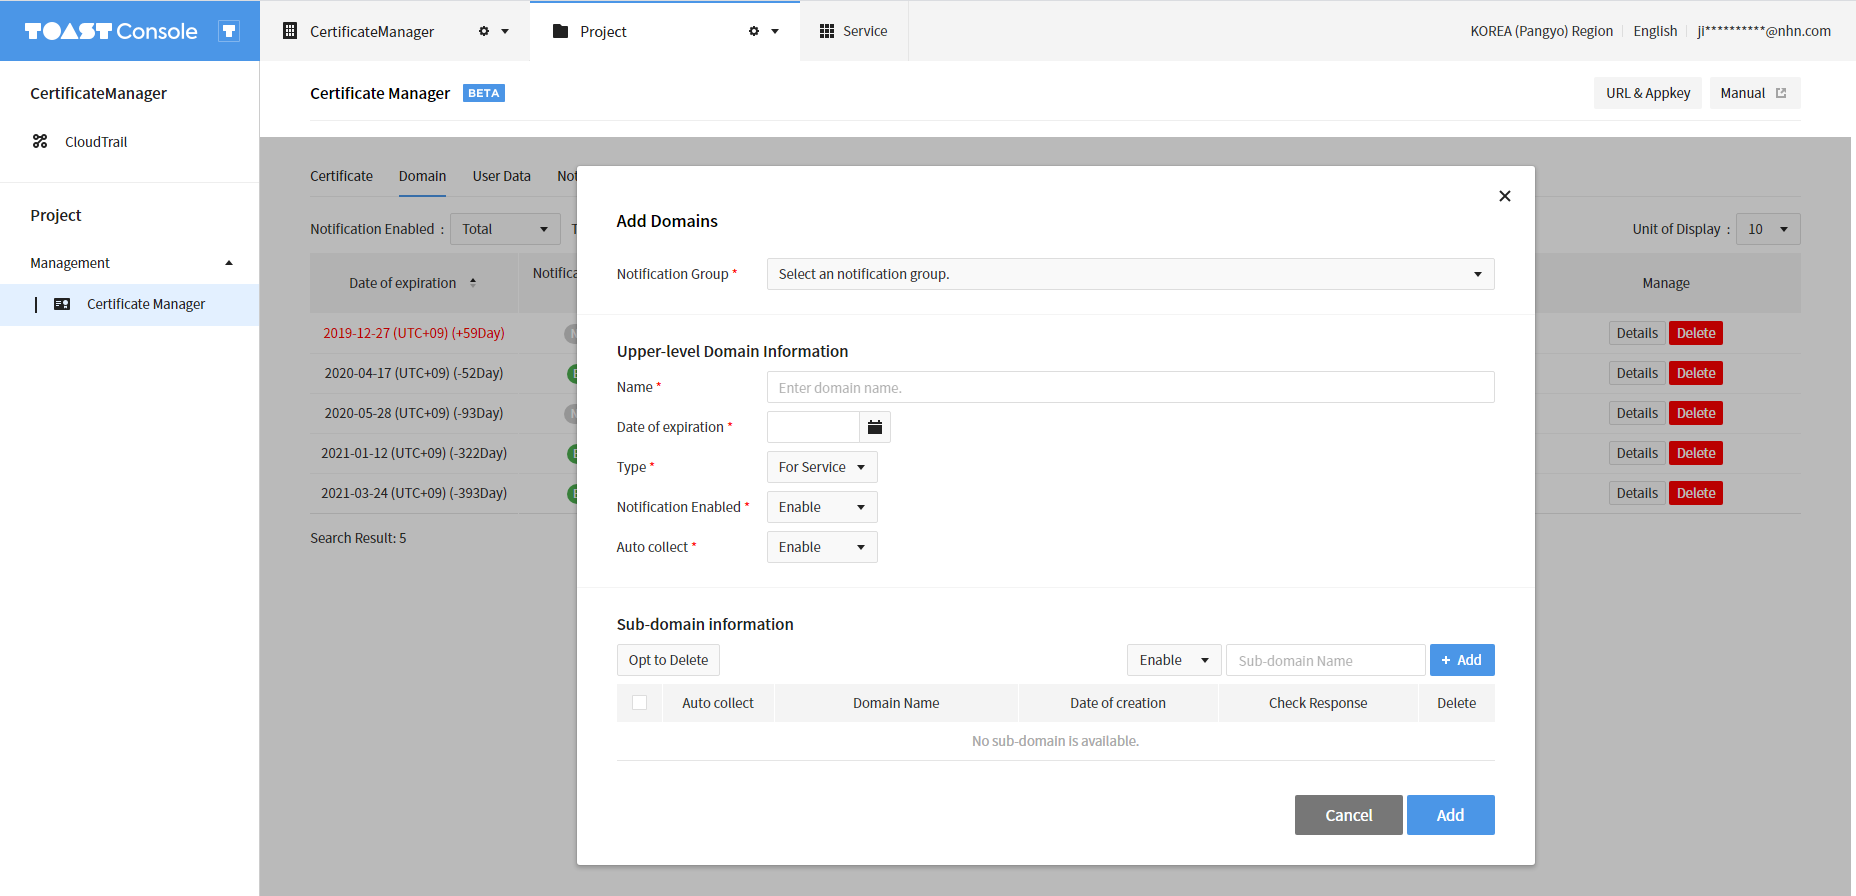
- On the main page of a domain, click + Add Domains and you can find the page as follows.
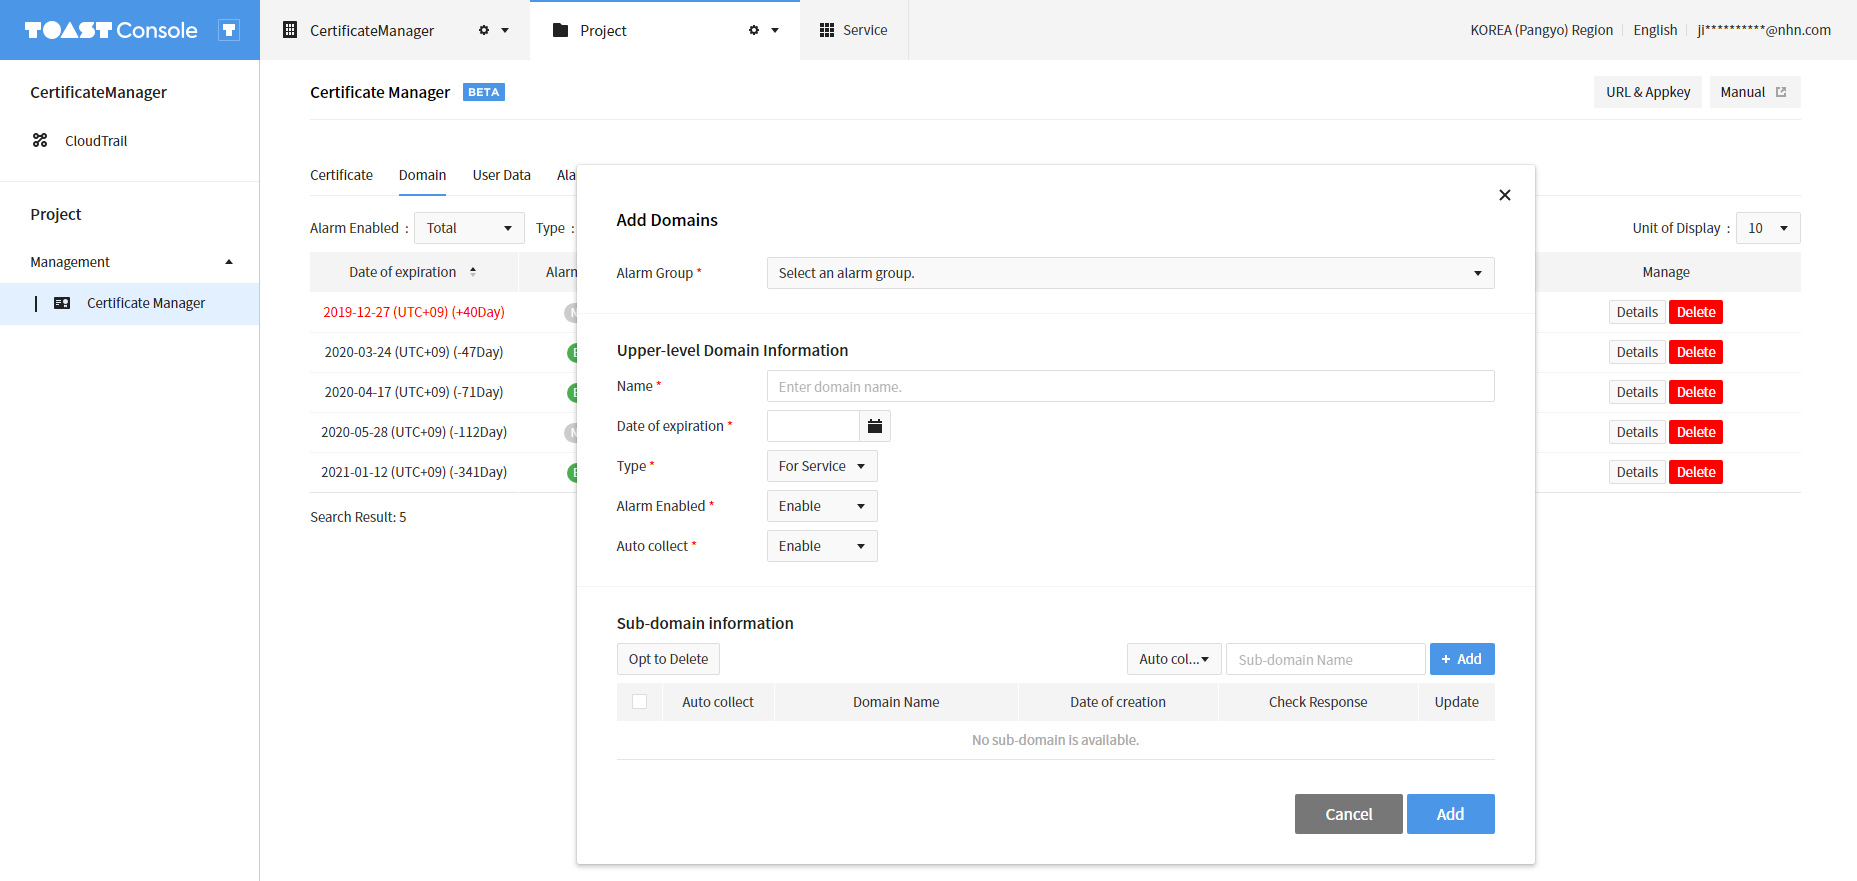
- Select a notification group to integrate. In case a notification group is not created, there is no available notification group, and hence domain cannot be created.
- Enter Name of a upper domain: upper domain names cannot be redundantly registered.
- Enter Date of expiration of the domain.
- Select Type.
- For Service refers to registering and using domains on a DNS server
- while For Defense refers to acquiring by purchase of domain for the purpose of service credibility, although it is not practically applied.
- Select whether to enable notifications. It shows whether to send notifications to each domain, and with Not Use, no notification is sent to the corresponding domain.
- Select to enable/disable Auto Collect. If Auto Collect is Enable, following items are automatically collected from the whois server:
- Creation Date
- Expiration Date
- Registrar (ex.Gabia, Inc.)
- Registration institution (Registrant, domain's real owner)
- Name server
- Enter whether to auto-collect sub-domain and name of the domain.
- With auto-collect enabled, call ping to the corresponding domain to check if it gets response successfully.
- A sub-domain name must belong to a upper domain.
- Name of a sub-domain must be same as that of a upper domain, or end with "[Name of Upper Domain]".
- ex. If a upper domain is named "toast.com", a sub-domain can be named as "toast.com", "www.toast.com", or "www2.toast.com".
- Click Add to save domain information as configured.
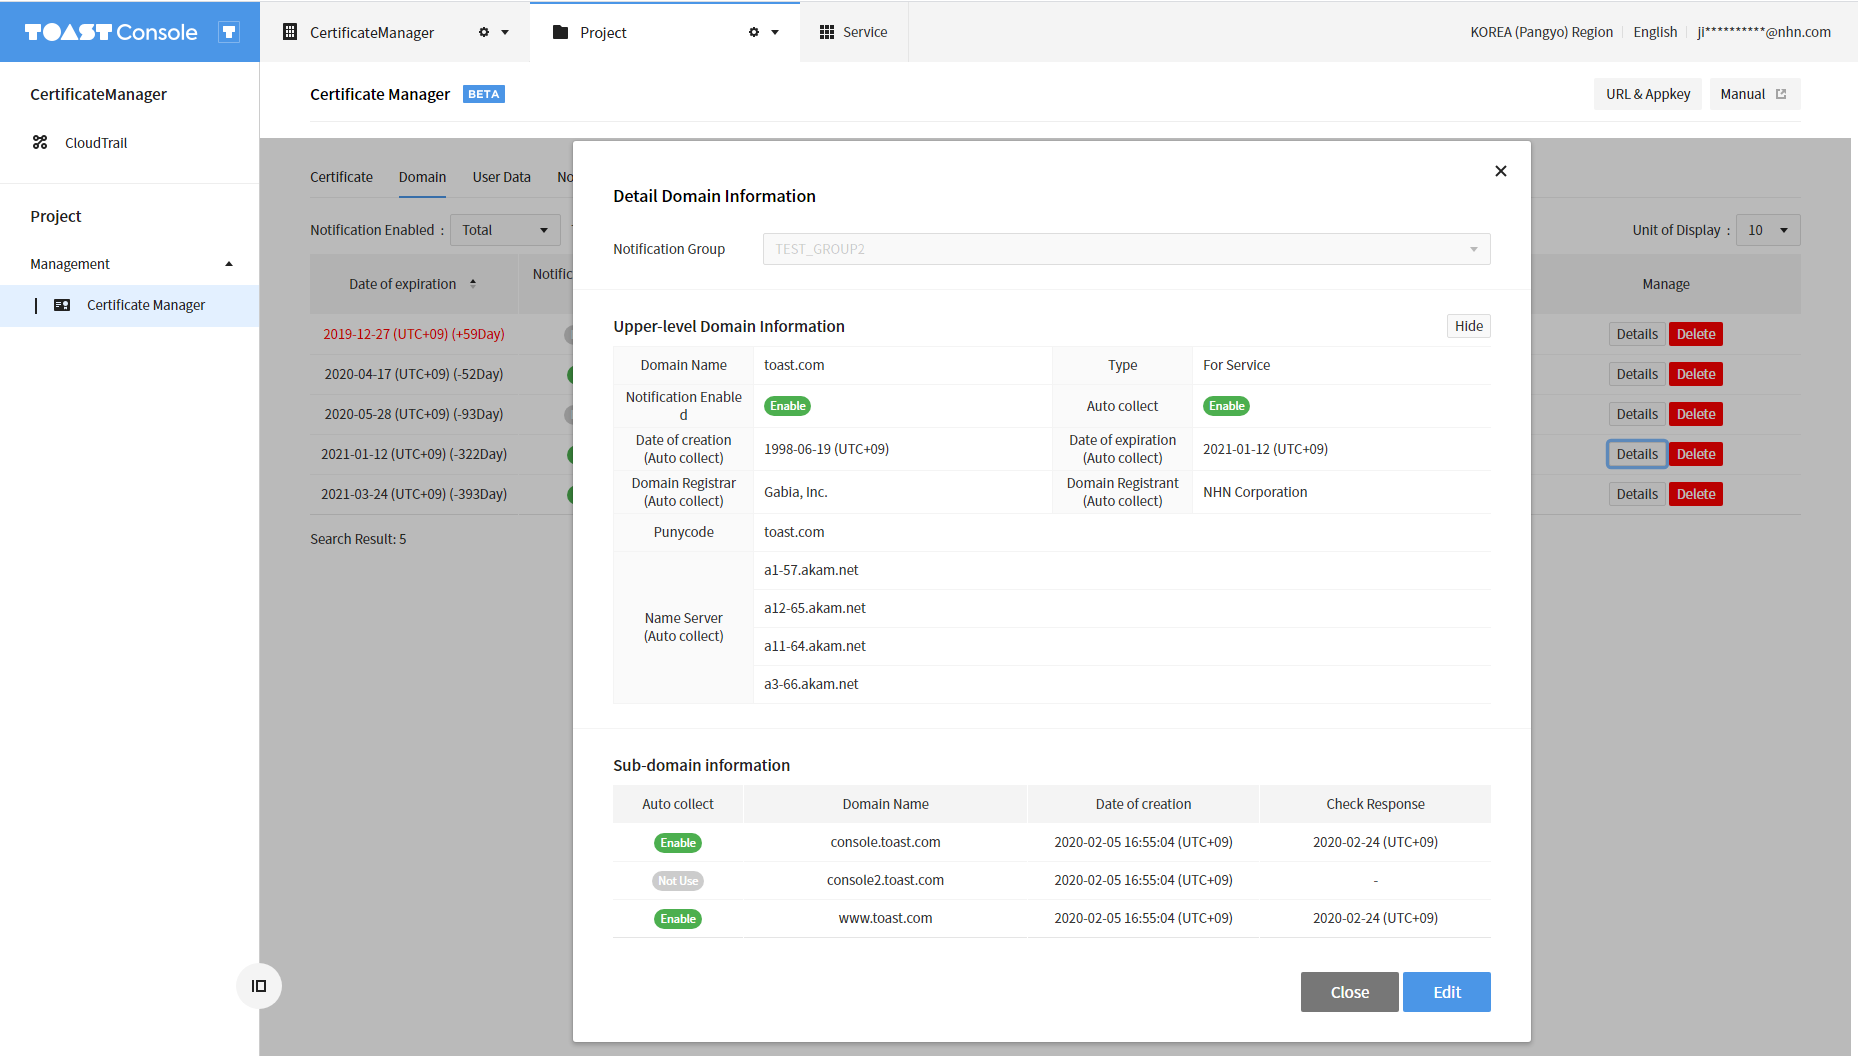
Detail Page
- Click Detail Information on the main page of a domain to find information of the domain and sub-domain and file.
- Fields specified as (Auto Collect) after field name refer to automatically collected items. If there is no automatically collected information, '-' shows.
- Click Edit to modify upper domain information, delete a registered sub-domain or add a sub-domain.
- Upper domain names cannot be edited. If a name must be edited, delete a registered domain and create a new one.
User Data
Enter data with expiration dates (e.g. license key) and notifications are sent to users in accordance with notification policy of an integrated notification group.
This feature is applicable when notification is required on a regular basis to specific user groups.
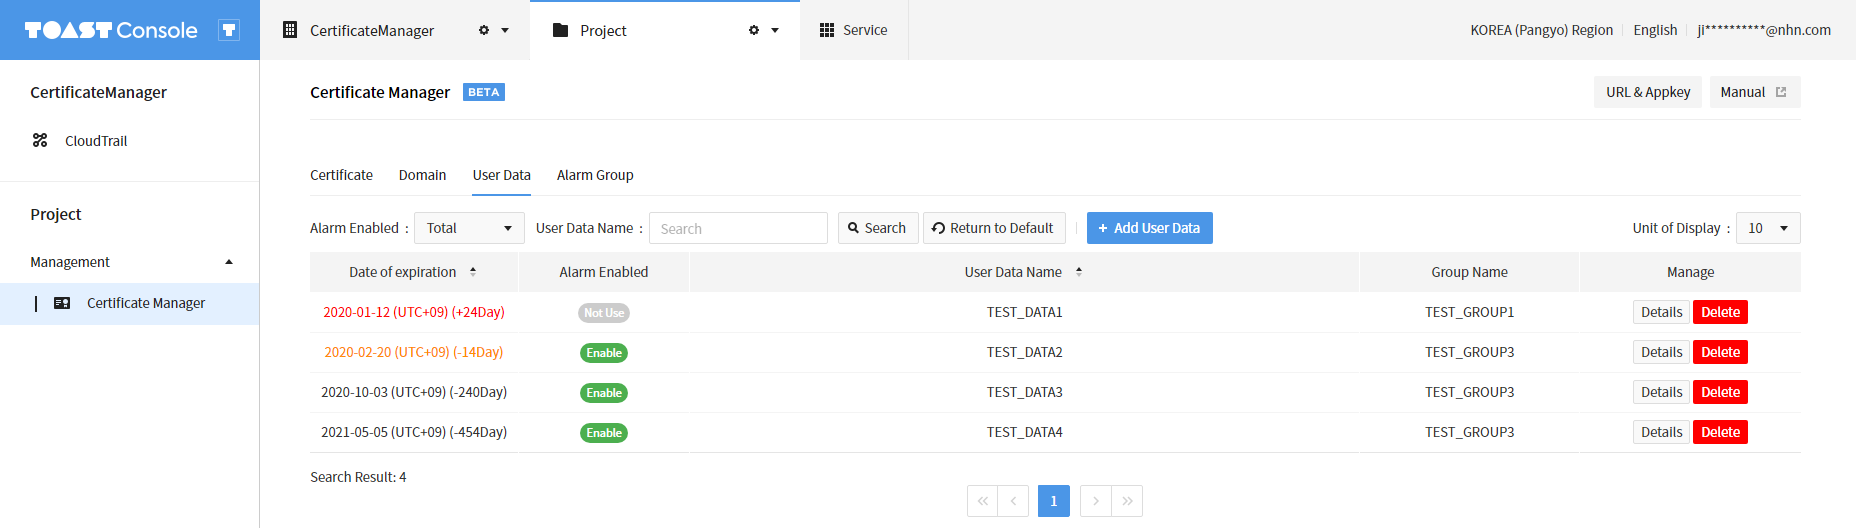
Main Page
You can find and search the list of already registered certificates. Also check remaining days until expired. As of today, expired data are displayed in red, whereas data with less than 30 days until expired are displayed in orange.
Creating User Data
Click + Add User Data on the main user data page and it shows the following.
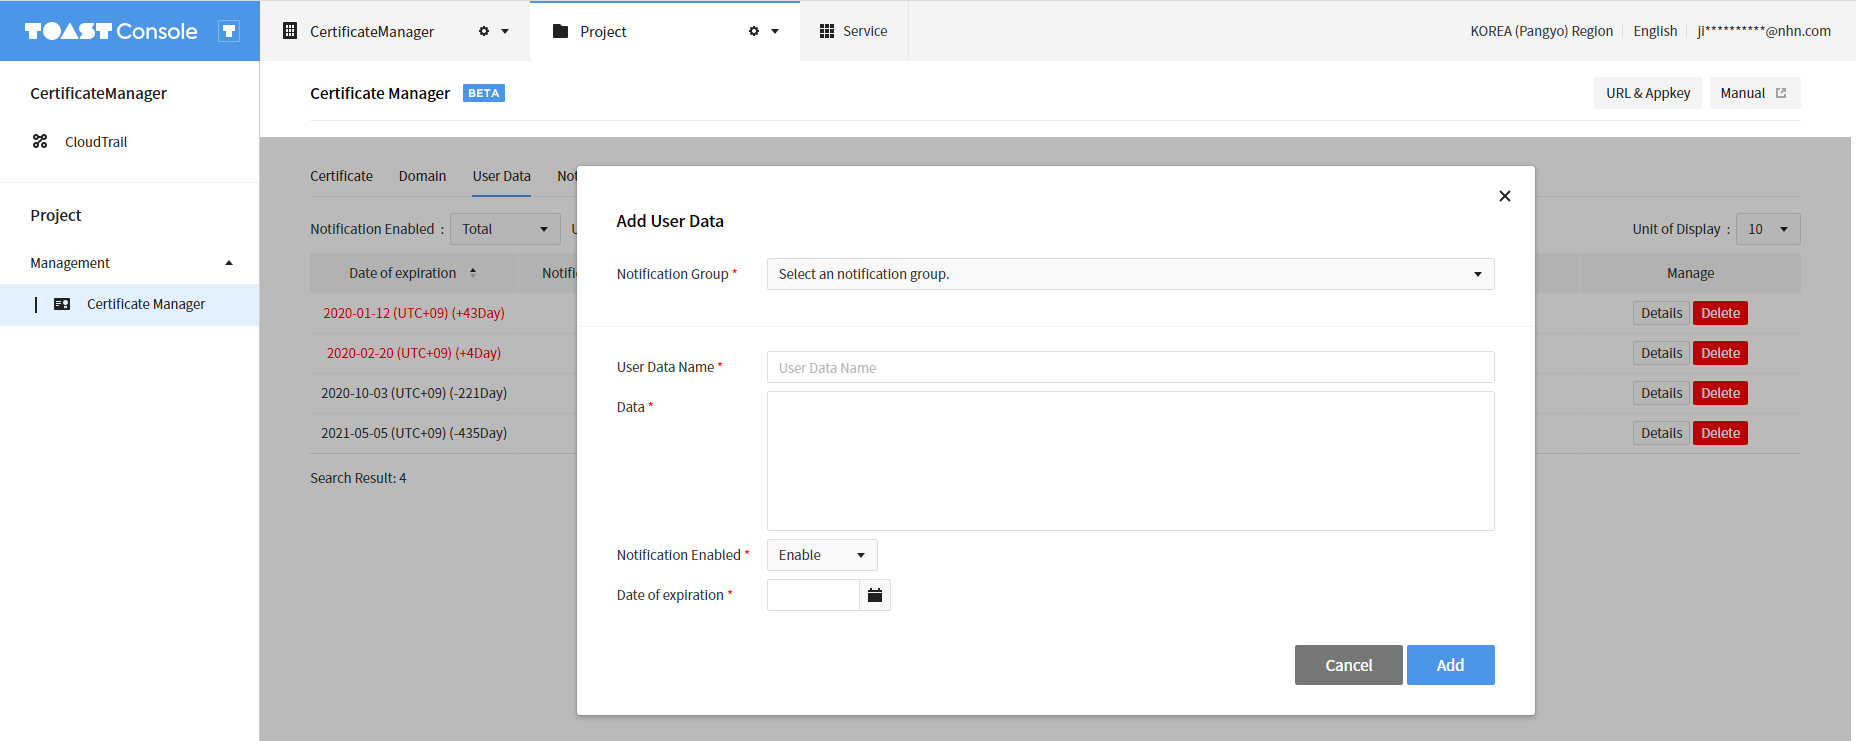
- Select a notification group to integrate. In case a notification group is not created, there is no available notification group, and hence user data cannot be created.
- Enter name of user data: user data name cannot be redundantly registered. Enter name of user data: user data names cannot be redundantly registered.
- Select whether to send notification, which refers to whether to send notifications on corresponding user data. With Not Use, no notification is sent regarding the user data.
- Enter expiration date of the user data.
- Click Add and save user data as configured.
Detail Page
Click Details on the main user data page, and user data information as saved shows up.
Click Edit to edit user data information.

Authorization for Retrieve/Download Certificates API
Create User Access Key ID and Secret Access Key
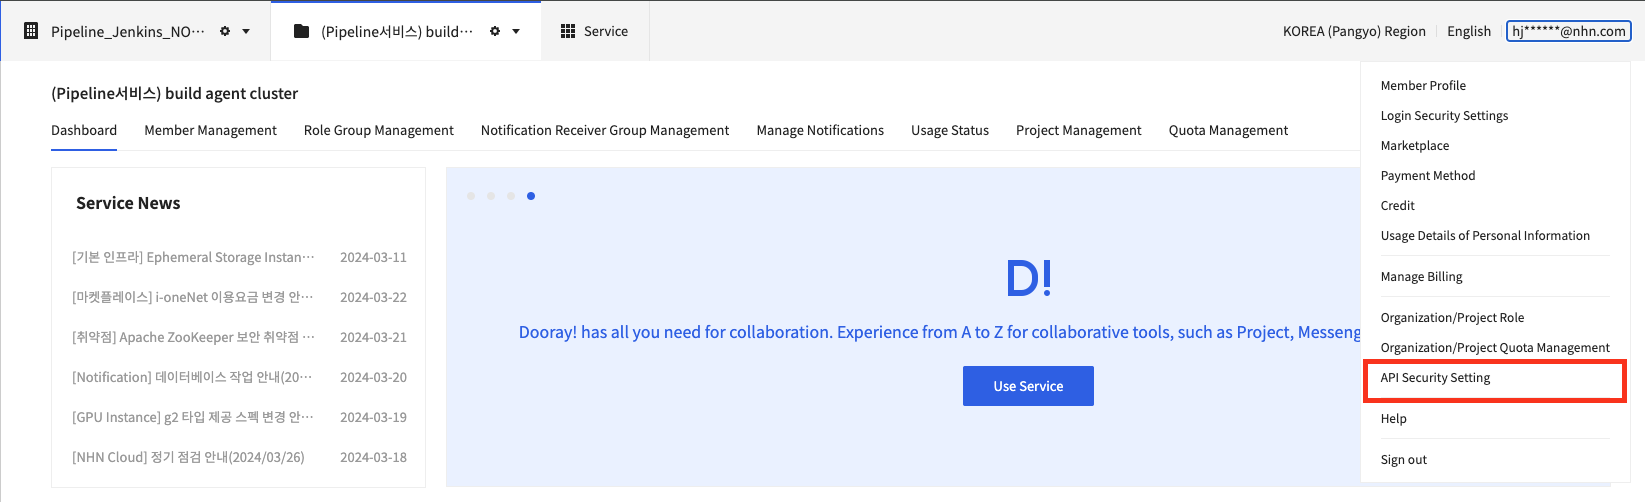
Click the ID area in the upper-right corner of the console to see the API Security Settings menu as follows.
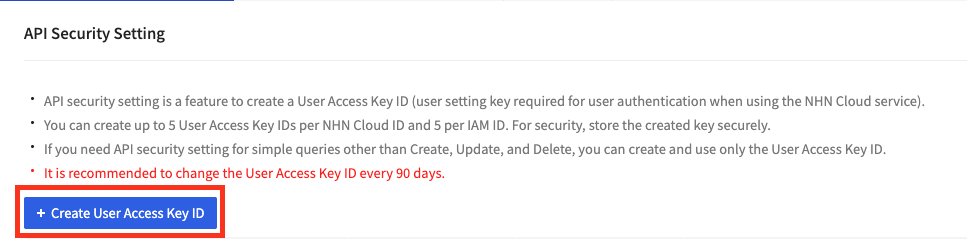
In API Security Settings,you can click Create User Access Key IDto create a User Access Key ID and Secret Access Keythat must be entered into the CertificateManager API header.
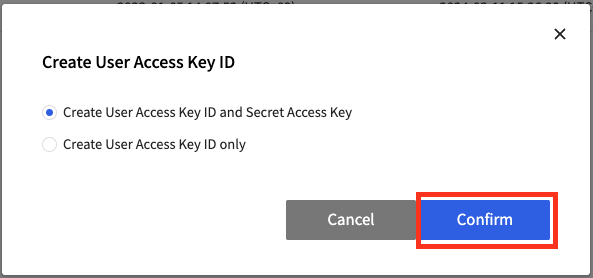
After creating User Access Key ID and Secret Access Key, the secret key successfully issued screen is displayed as shown below. The secret key is only given to you once in that popup screen, so make sure to keep a good record of this value.

The User Access Key ID, which is required for API requests, can be found by closing the secret key successfully issued popup.

Table of Contents
- Management > Certificate Manager > Console User Guide
- Notification Group
- Creating Notification Groups
- Detail Page
- Notification Setup
- Adding Notifications
- User Group Integration
- Adding Users
- Certificate
- Main Page
- Creating Certificates
- Detail Page
- Creating Certificate Usage/Installation Information
- Page of Certificate Usage Information
- Domain
- Main Page
- Creating Domains
- Detail Page
- User Data
- Main Page
- Creating User Data
- Detail Page
- Authorization for Retrieve/Download Certificates API
- Create User Access Key ID and Secret Access Key